
![]()
Introduction
This tutorial addresses the use of Git and Gitlab together with STM32CubeIDE.
Polytech students must get a clear understanding of the following, because Gitlab will be massively used in the future to evaluate their progress. For others, if not interested, you may just skip this tutorial.
What is Git?
"Git is a version control system for tracking changes in computer files and coordinating work on those files among multiple people. It is primarily used for source code management in software development, but it can be used to keep track of changes in any set of files. As a distributed revision control system, it is aimed at speed, data integrity, and support for distributed, non-linear workflows." Source : https://en.wikipedia.org/wiki/Git
In the tutorial program, we will use a single sandbox project my_projet that will grow as you experiment with new STM32 peripherals or new hardware/software mechanisms. Git will be used to take snapshots (current project state) of your progress along the way. Far from a proper Git introduction, here are the few things you need to know.
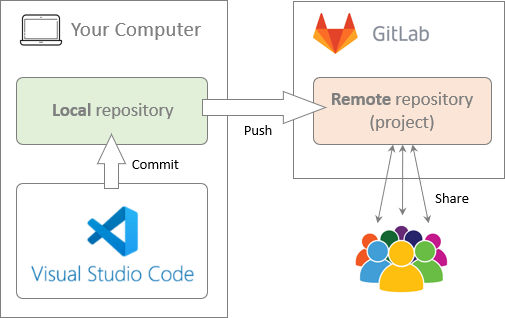
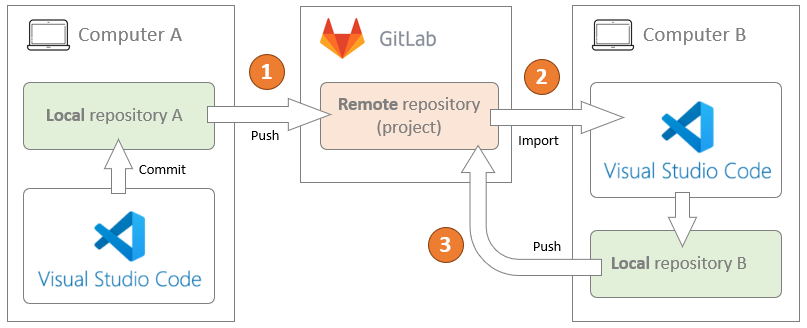
Together with Git, comes the idea of repositories. A repository is simply a file location where changes in you project files are tracked and recorded. Usually you'll have to deal with 2 repositories:
- A local repository. It is located on your computer. The basic operation of recording the changes in your project files to that repository is called a Commit action.
- A remote repository. It is located on the network. It is used to share project progress with other developers and therefore allows for collaborative developments. The basic operation of synchronizing the remote repository from the local repository is called a Push action. Remote Git repositories are hosted by servers either on the cloud or on local networks. Well known platforms are GitHub and GitLab. We will use a private GitLab instance, installed on a school server.
A Commit is also the name given to the snapshot resulting from the commit action at a given point in time. In a regular development process, the committing strategy is up to you. You do not need to commit every time you make small changes. You would rather commit when you feel like current project version reached a state that deserve a dedicated archive before you go further. It is a kind of a milestone.
1. GitLab
GitLab is a web-based Git repository manager (see https://about.gitlab.com).

The Polytech GitLab instance is available here : https://gitlab.polytech.umontpellier.fr
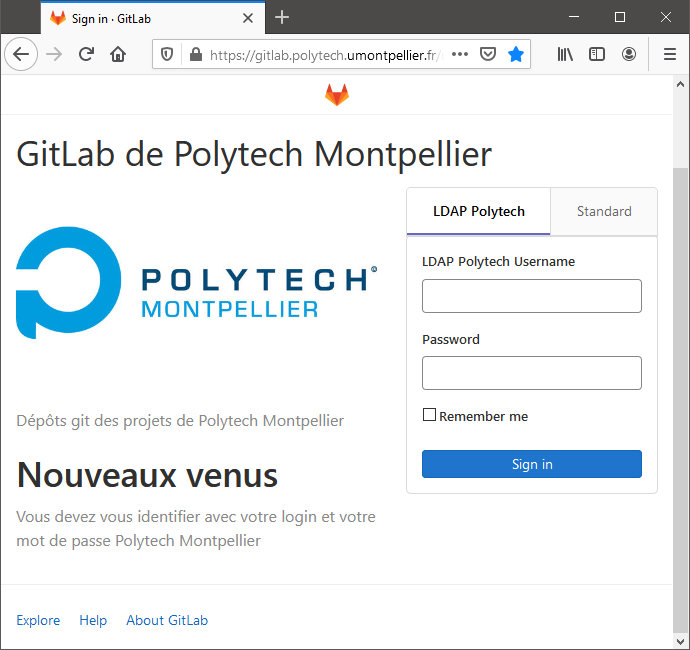
You should be able to connect with your Polytech regular login/password.
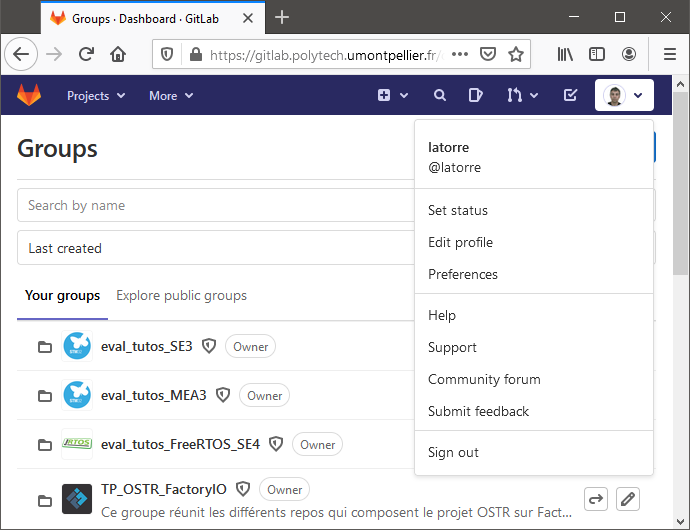
From there, you can browse existing Groups and Projects, either yours or other's, that have been made available to the world, or to local users.
2. Git integration with VSCode
On Mac and Linux computers, Git is natively supported. You can therefore perform Git operations, locally or on the remote server, using command line interface (CLI) from any terminal.
On Windows, you can install Git for Windows software (https://gitforwindows.org/) to make such things available using the gitbash terminal. Don't do it now unless you're willing to learn Git commands (which would not be a bad idea anyway, but not necessary for now).
In these tutorials, we're not going to use direct commands but VSCode Git integration instead. It provides a simple graphical interface approach to using Git and remote servers to archive your project, track changes in source code, and collaborate with other developers.
3. Creating a local repository
3.1. Initialize the Git repository
If you created your project using cargo init, you don't have to follow this step, as a Git repository is already initialized with your project... Skip to part 3.2.
_We're going to use the my_project project for these experimentation. At the moment, it is a clone of blink, but I have removed the .git folder (as indicated in the importing and cloning a project page)._
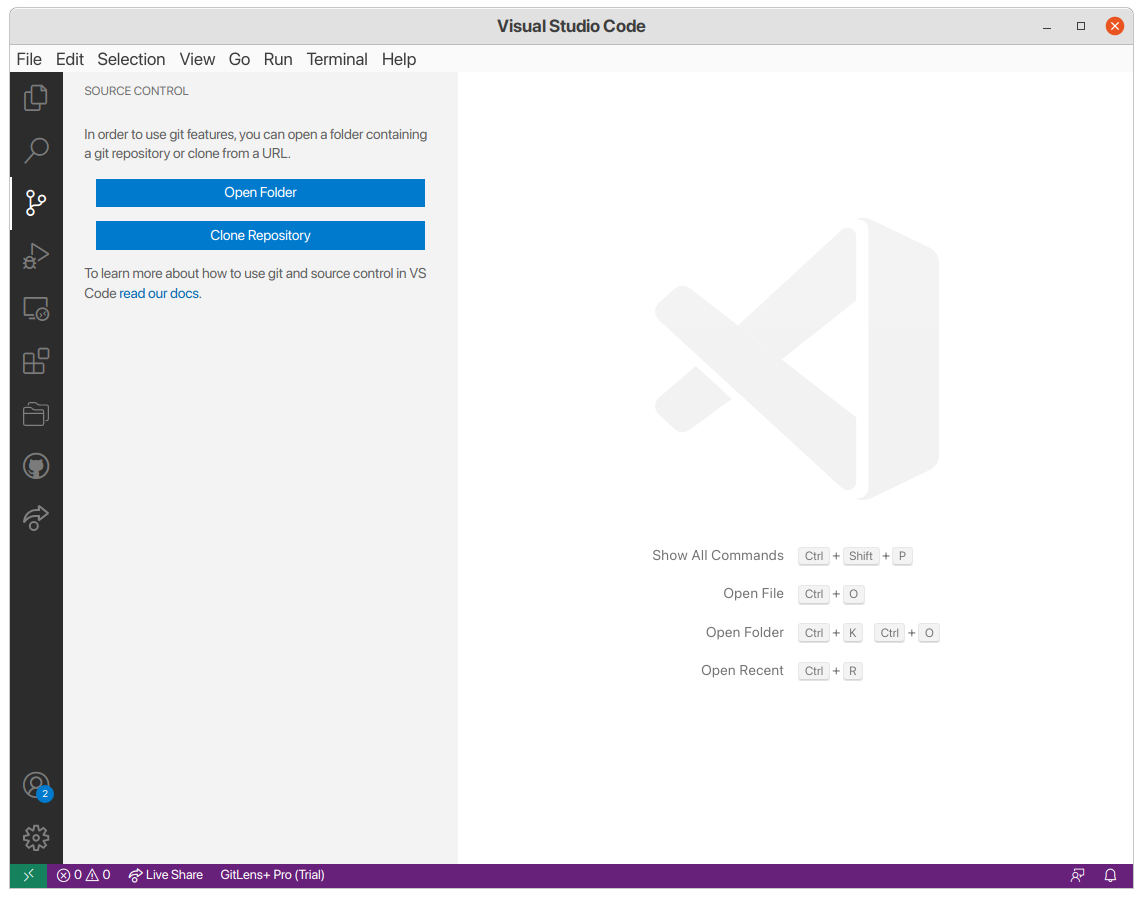
Open your new project in VSCode and click on the Source Control tab (we'll call it the Git tab as of now...):
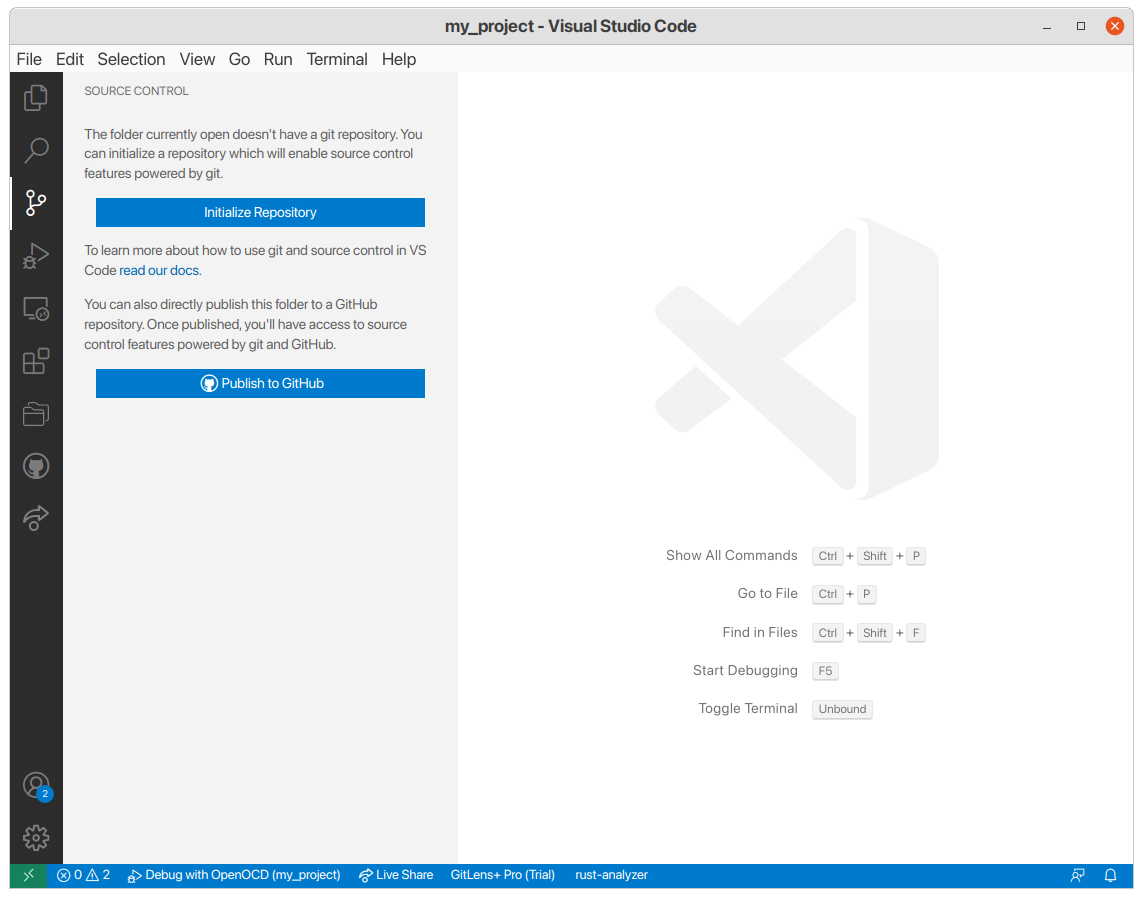
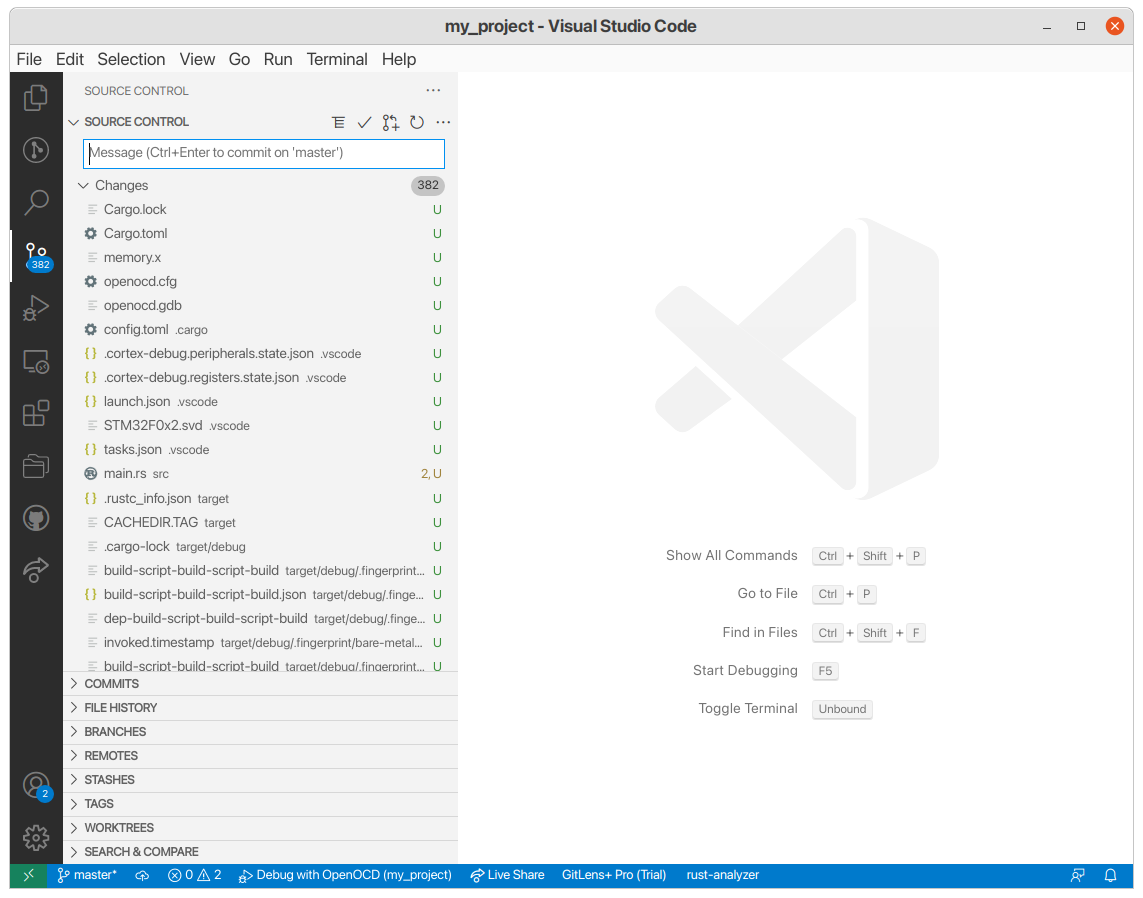
Click on the big blue Initialize Repository button. Your project is now initialized as a Git repository and you should see all the changed files (which are all our files as we just created the repository) on the left of the interface:
3.2. Unwanted files (.gitignore)
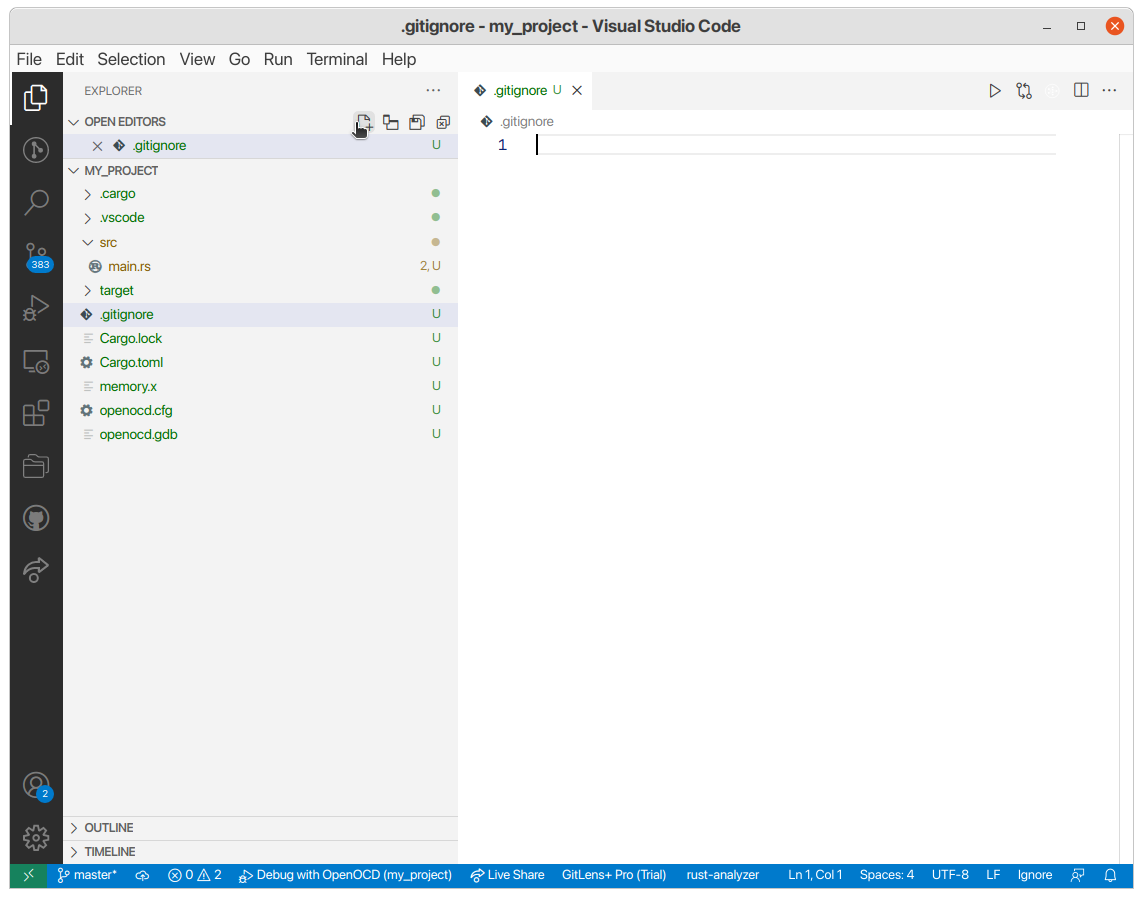
There are a lot of files we don't care about in this list and we may not want to upload them all to our Git server (GitLab)... Go back to the main Explorer tab and create a new file called .gitignore in your project's main folder:
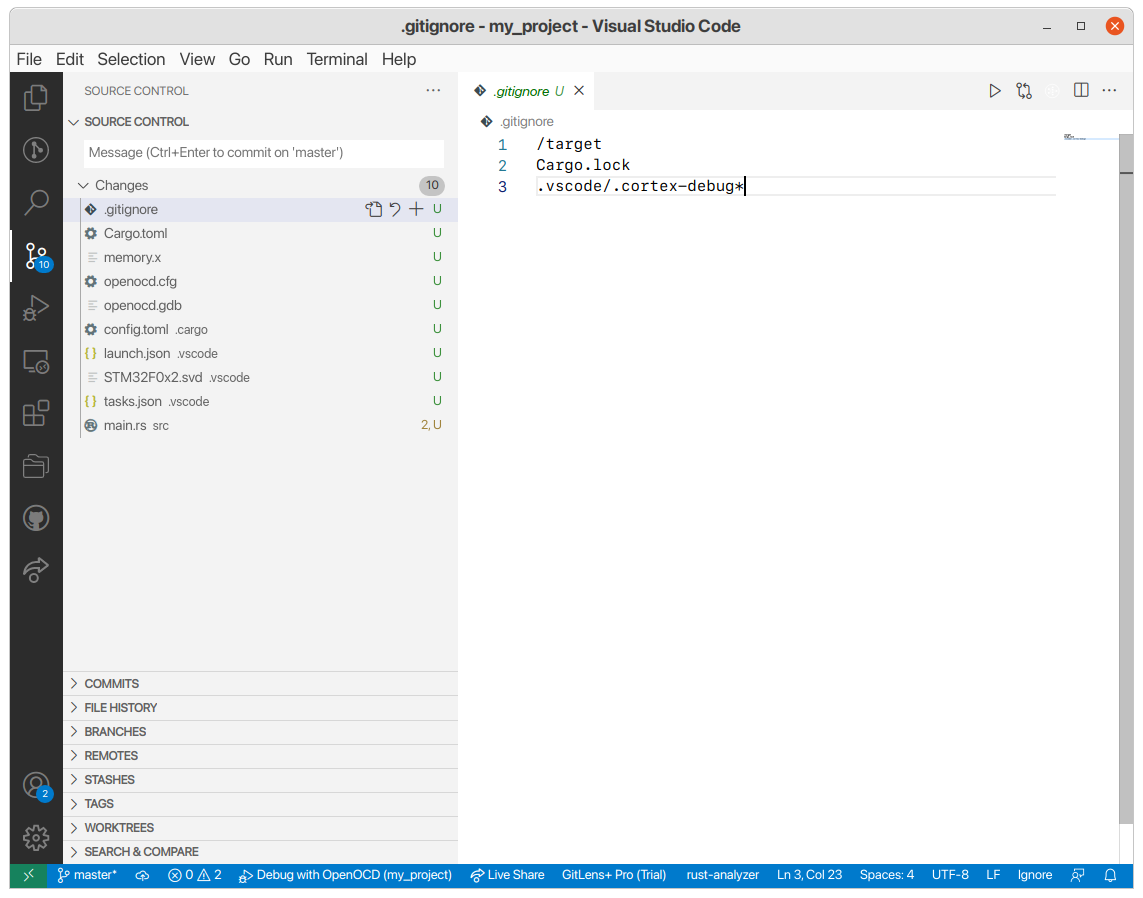
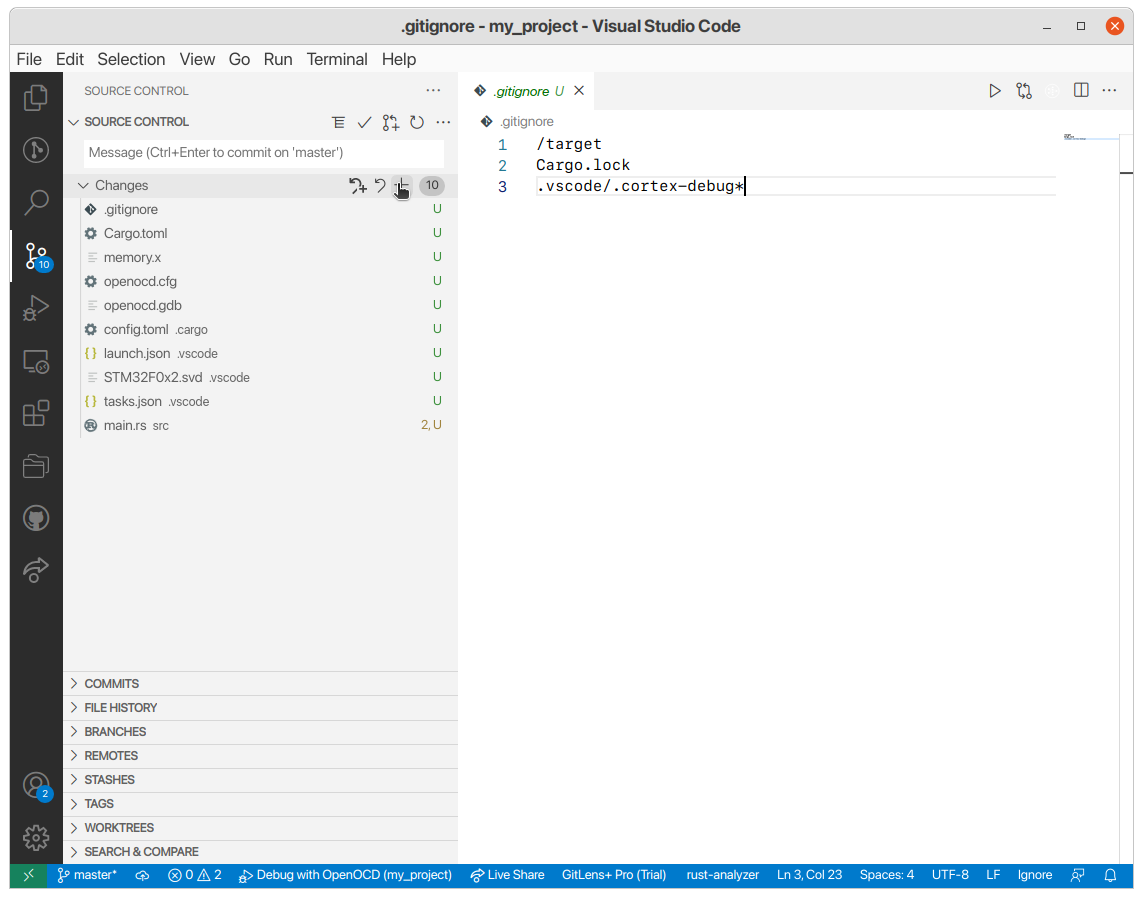
Fill the .gitignore with the names (or the path) of the files you don't want to upload in your GitLab repository. For example:
/target
Cargo.lock
.vscode/.cortex-debug*
Go back to the Git tab and you should see that all our non-desired files have disappeared of our "Changes" list:
4. First commit
The Commit action is used to save your project changes to the local Git repository. For a project that was never committed before, well, everything is considered as changes.
In the Git tab, the (Unstaged) Changes area lists all the files that have changed since last commit (i.e. all the source and project files here). Click the "Stage all changes" button:
Then enter a Commit Message (mandatory) which describes the purpose of committing.
Then, click the ( ) Commit button.
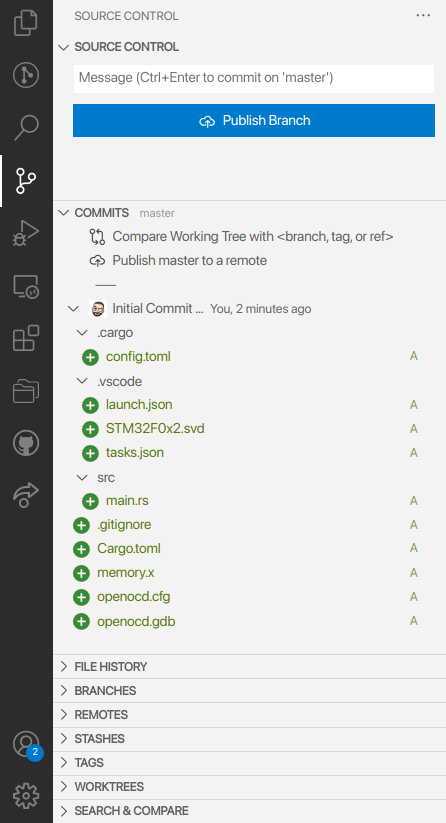
Congratulations, you've successfully performed your fist commit!
You can review commits' properties by opening the COMMITS panel:
5. Keeping track of changes
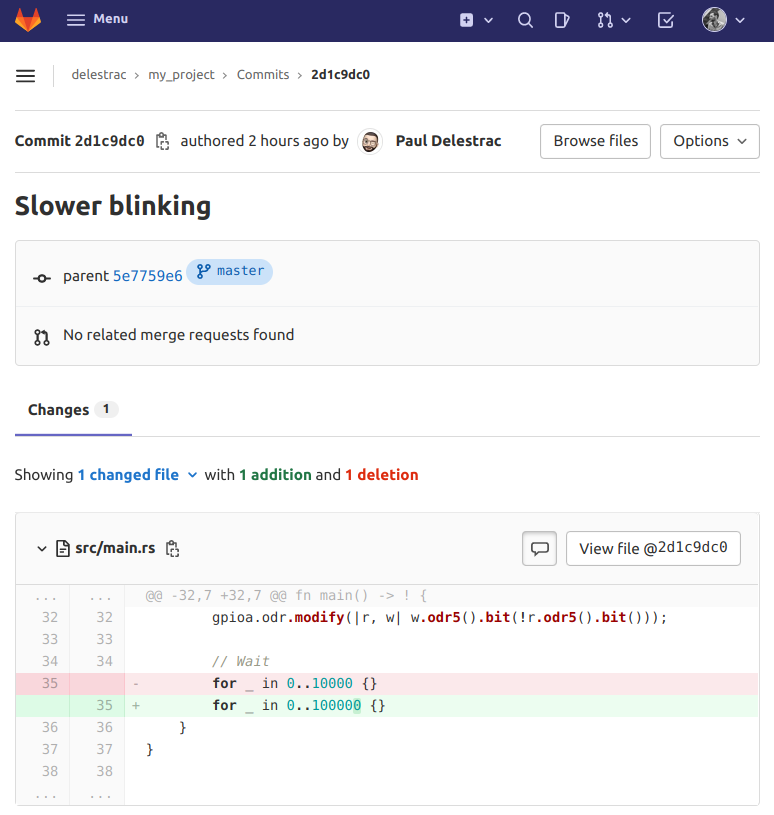
You remember that, since we changed clock settings, the my_project demo now blinks very fast.
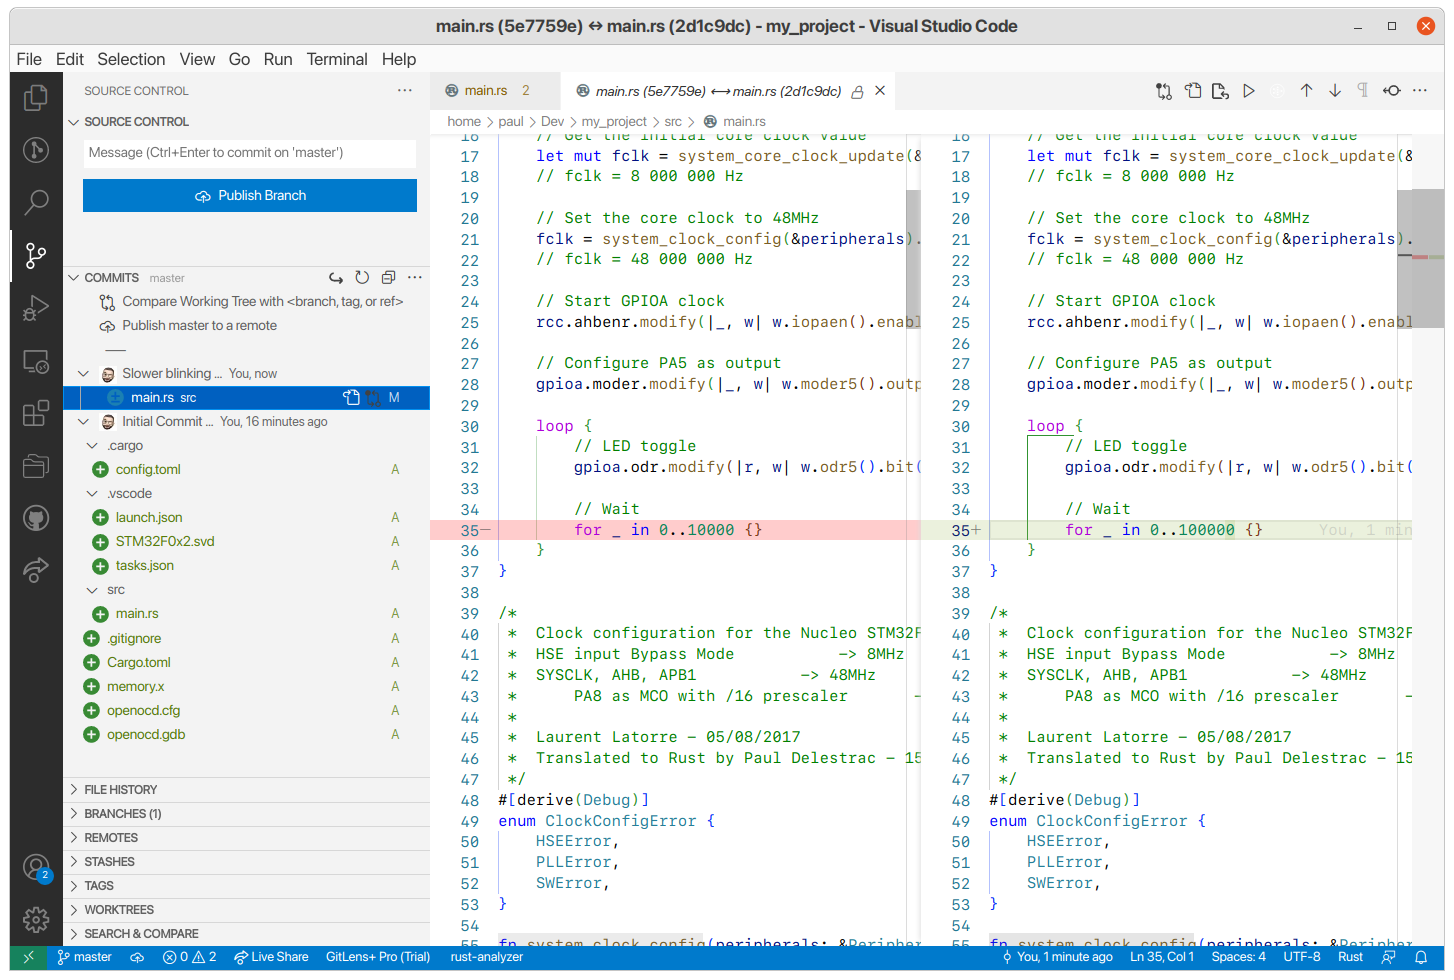
Edit the main() function and apply a ×10 factor on the waiting for loop:
    loop {
        // LED toggle
        gpioa.odr.modify(|r, w| w.odr5().bit(!r.odr5().bit()));

        // Wait
        for _ in 0..100000 {}   // <- Change from 10000 to 100000
    }
Save the code (Ctrl + S) and start a debug session to verify that you obtain the expected effect on the LED blinking (slower blinking).
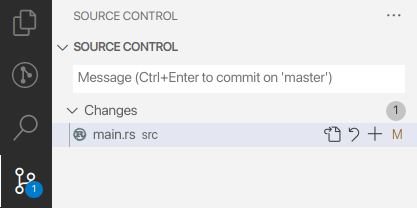
Notice that the change in main.rs has been detected and it is now flagged as '>' dirty. That only means that the file main.rs is no more in sync with the repository.

main.rs is now candidate for staging.
Stage the file and add a commit message (e.g. "Slower blinking"), and then Commit the changes.
You can then use the COMMITS panel, and select the commit and file your want to review:
6. Remote Push to GitLab repository
Next step is to Push the local repository into a remote repository on GitLab. To do that, we need:
- To create SSH key pair (private/public) to authenticate the communication between your computer and GitLab
- To register/associate the public part of SSH key with your GitLab account
- To create the remote repository via the GitLab web interface
- To configure the remote repository within VSCode
- To perform the Push action
Let's go!
6.1. Creating a SSH key pair
In order to have your computer working with GitLab, we must first setup an authentication mechanism which links your computer session to your GitLab account with some degree of security. This is done by means of a SSH-RSA key pair (public/private). Note that this authentication method is not specific to VSCode.
The first step is to generate a random SSH key pair (public/private) and to store those keys somewhere well identified on your computer. You can use any software tool able to generate SSH keys. On Mac and Linux, the ssh-keygen command is available. (On Windows, you may use PUTTYgen if you're after a standalone solution.)
Open a terminal window and run the command:
$ ssh-keygen -t rsa

Generating public/private rsa key pair.
Enter file in which to save the key (/home/paul/.ssh/id_rsa):
If you're using your own computer the default path is OK. When using school computers, you should set the SSH2 home to somewhere in your network user folder (e.g. P:\.ssh). Doing so, you will be able to access GitLab from any workstation in the school when logged with your credentials.
You can leave the passphrase empty and then you'll have generated your SSH keys:
Your identification has been saved in test
Your public key has been saved in test.pub
The key fingerprint is:
SHA256:xxxxxxxxxxxxxxxxxxxxxxxxxxxxxxxxxxxxxxxxxxx paul@paul-Precision-5540
The key's randomart image is:
+---[RSA 3072]----+
|       .o*. .    |
|    o o.+... . . |
|   . o.  o.o  o .|
|    . oo. + o ..o|
|   o o  S+ + o ..|
|  . o ....+ * .  |
| . . . . E . X = |
|  o   . +   B o =|
| .     o     o  .|
+----[SHA256]-----+
Two files were generated:
~/.ssh/id_rsawhich contains your private key (don't ever share it with anyone). The file starts and ends with:
-----BEGIN RSA PRIVATE KEY-----
YOUR RSA SHOULD BE HERE
-----END RSA PRIVATE KEY-----
~/.ssh/id_rsa.pubwhich contains your public key (we'll use this one to link with GitLab). The file's content should look like this:
ssh-rsa AAAAB3NzaC1yc2EAAAADAQABAAABgQC/hy6mCkNcjtaHU0EJeLKRP7a6XK5cY9idBC0W61MFC8raauQ43P+6jZ41B02KIWNZtMwZN4OkDGp9bWHinDbSyqyhvgEoe5xEkJaC5R3uQPO1r7o99PFwM5lLA8Tp96CKI/JpywsGZBho1tSyNFI+sF1dVFwmTOi8Vg+v8QdXWsri2vOQauHdmU0jRXUaNs8RsInGlCziYVfdwwC2vcY353qpvhFKkf8CDZJs6N9OmnfgZDJAZI9F2R4k+u18SVuUENp5OrY4rpwWpLTokNnbZiQnslu/bhpqReDxssQIZkIT68z4m7nqRhyBgAEcd2s+IGfrUn8eU5bNdHbuUmkzSa03sXk1XiEMXKbS1LdTqpTzKcFKZ6nQpCiMvveIj/xlEc6k6llOBTWhbKklBhLwAyjBANGtiwNzCdzg85MvsDI6ShHkq4nGehXG1uaDV0gTA9hFNBaSZUvF0wDb2CFP4VuQrK35HS4iysD8Yu77yOZXK8J9bkeQ7wvI+03kipM= paul@paul-Precision-5540
That's the part you need to register and associate to your GitLab account. Just copy (Ctrl + C) the whole file content into the clipboard for now.
6.2. Registering your key within GitLab
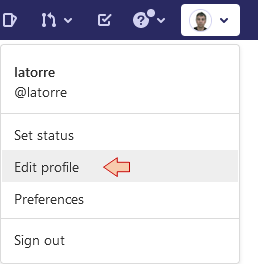
Log into GitLab web interface go to your user Settings:
Then from the lateral left toolbar, select SSH Keys:

In the Key field, paste the content of the public key you generated before. Then press the Add Key button.
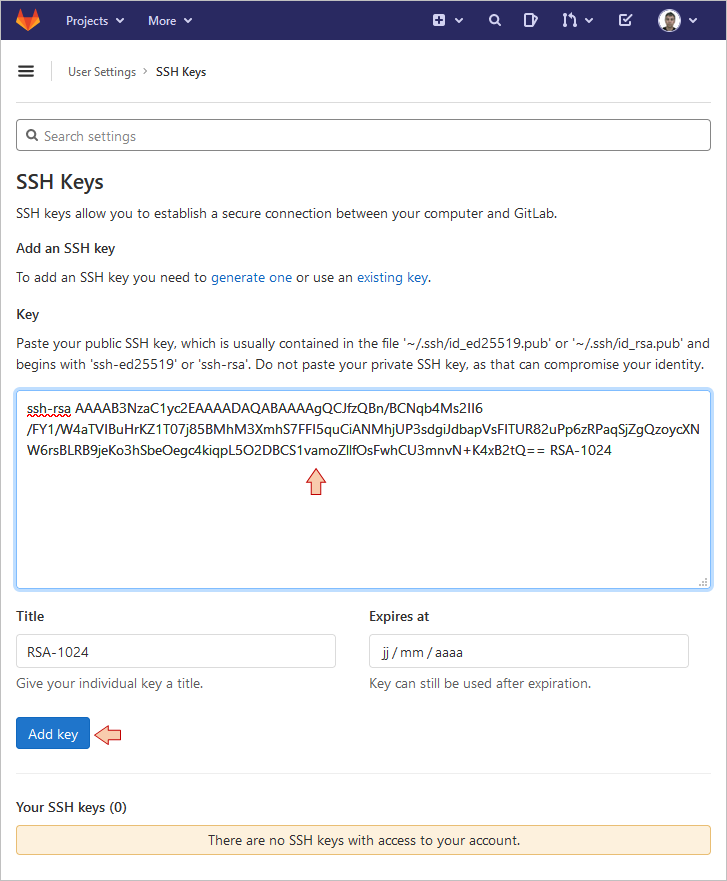
This will add associate new SSH key with your GitLab account. You should event get an email from GitLab saying so.
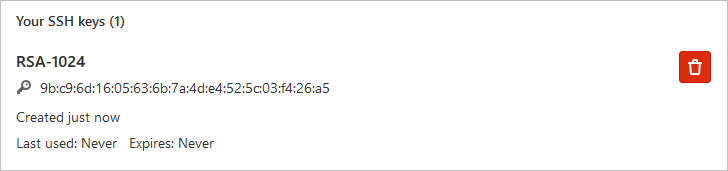
Going back to SSH Keys main window, you should see the newly created key:
You don't need to repeat the above steps for every project (key generation and registering). Now that you have a key on your computer, which is registered on your GitLab account, it can be used with any workspace or any project, even beyond STM32 programming and VSCode. It is attached to the computer, not a particular software.
6.3. Creating a GitLab remote repository
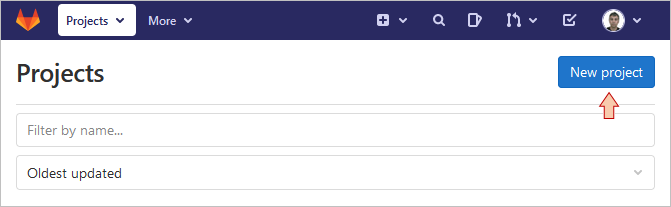
Still within GitLab web interface, and from the top toolbar, select Projects →Your Projects. Then click the New project button.
Choose Create blank project. You need to provide a name to the project. Although not mandatory, let-us give the same name as the project from VSCode we want to associate with this repository. You can also add a project description if you like, and finally choose which level of privacy you want. In any level of privacy, edits are only possible for project members only.
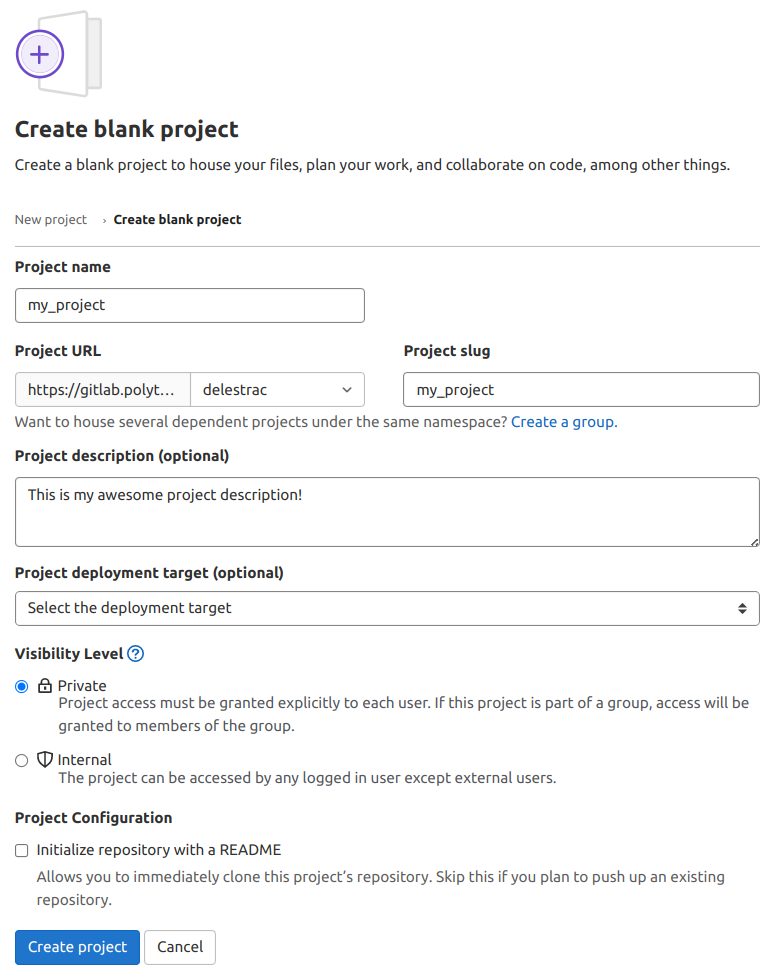
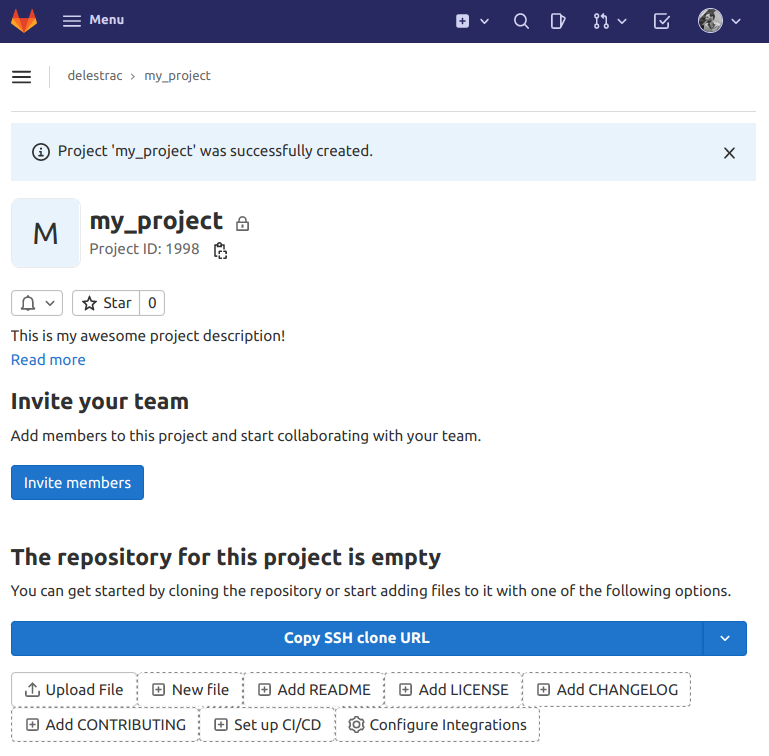
When you're done, click the Create project button.
You’ll end up with an empty new project as shown below. Leave this page open, but put the navigator window aside for the moment.
6.4. Configure the remote repository within VSCode
From GitlLab web interface, copy the project URL in the clipboard using the Copy SSH clone URL button:

Open the Git tab from VSCode and access the REMOTES panel:
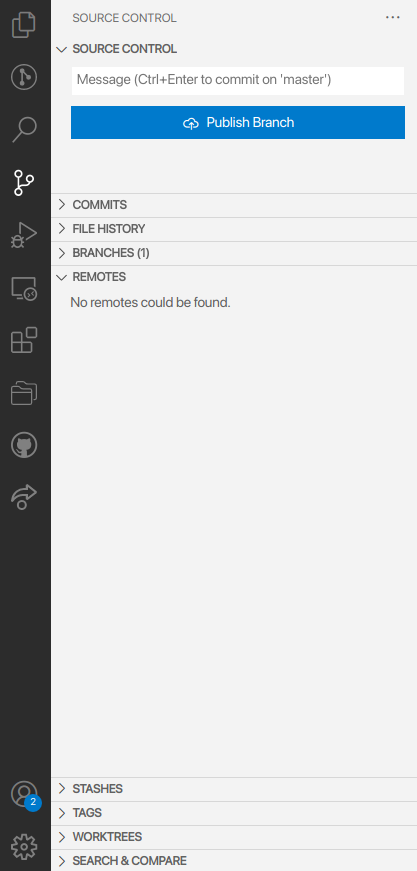
Hit the Add Remote button (+ sign on top of the REMOTES panel) and give your remote the name: origin.
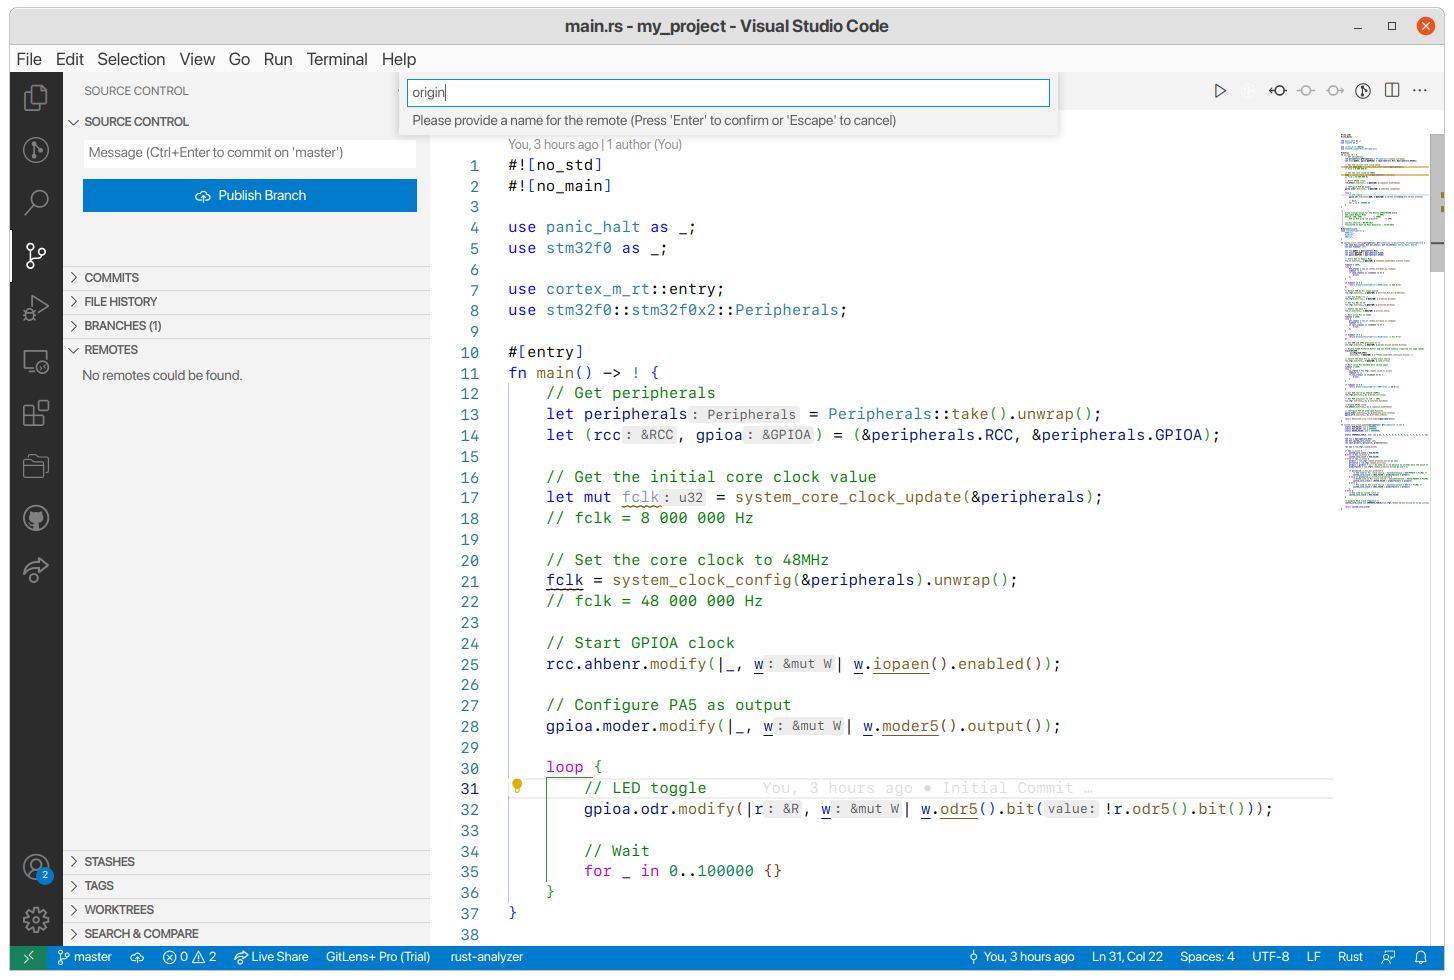
Fill the Git Remote URL with the SSH URL you previously copied:

Hit Enter... The remote should be now linked...
6.5. Perform the Push action
Everything is now in place for the first Push onto the GitLab server.
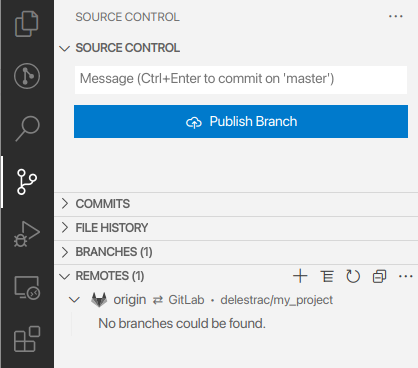
Hit the big blue Publish Branch button at the top of the Git tab.

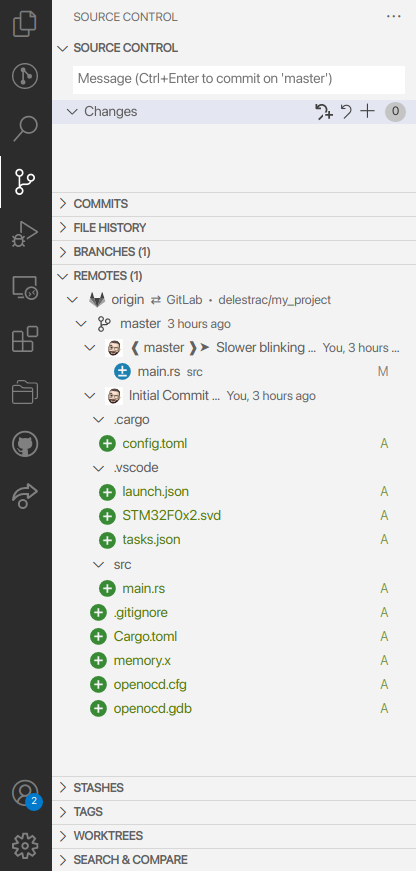
You're done! You can now see your master branch in the REMOTES panel
And directly on GitLab
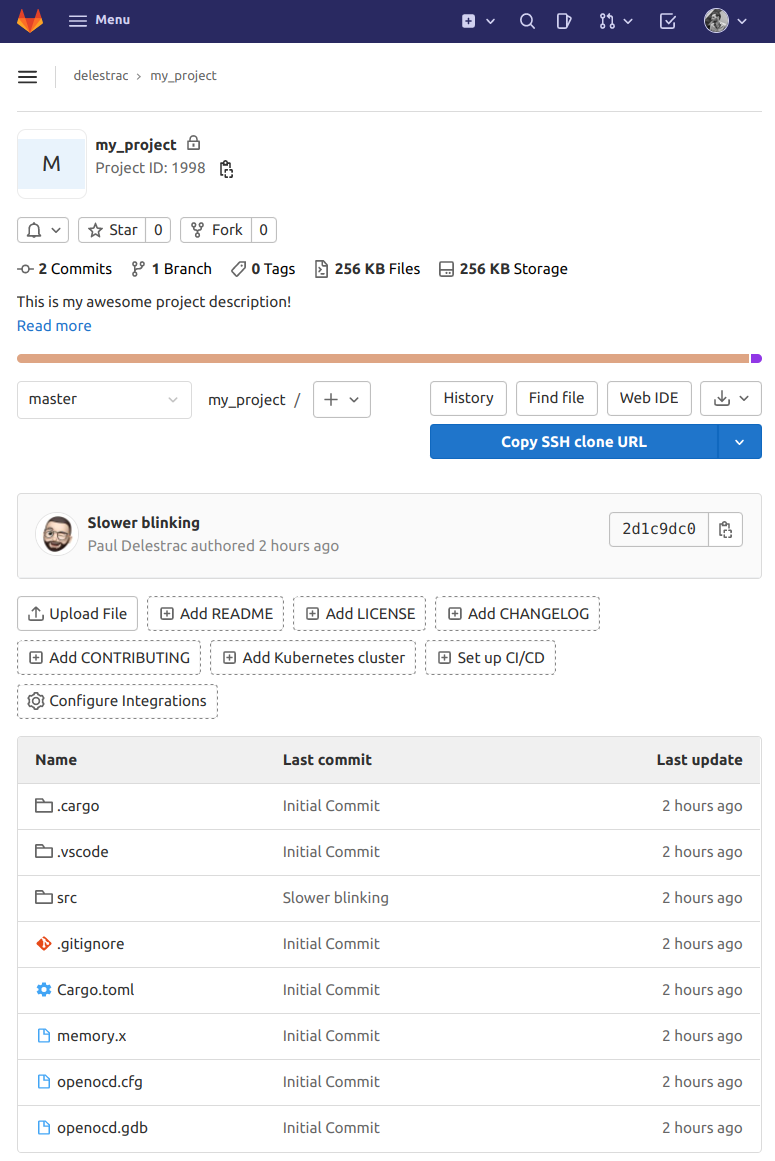
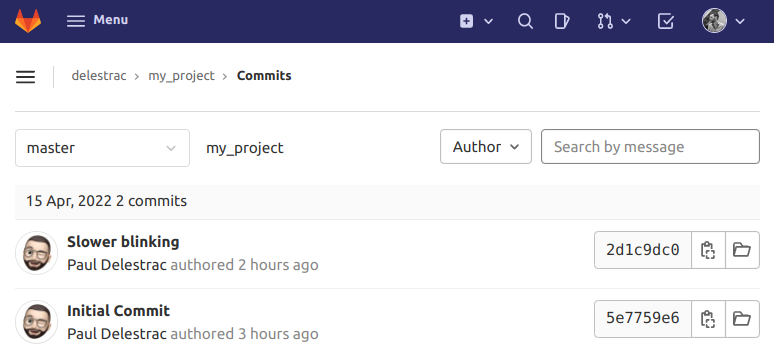
Actually, not only the last commit is there, but all the commit history. Click on the link:

The whole commit history is there:
Select the Slower blinking link for detailed review. You'll see all the changes this commit holds, just like within VSCode:
Before moving to the next section, let us summarize some important concepts:
- The pushing action simply synchronizes the remote repository with your local repository.
- Because a single commit only holds differences with respect to the previous commit, then when you push your last commit, Git needs all the history of changes since the first commit (i.e. the complete history).
- For that reason, it is not possible to push a commit made on project_Y on top of an history built with project_X. Even if project_X and project_Y "look" the same. This happens if you move your project from a computer to another one, or if you change workspaces. You won't be allowed to continue pushing if the history is broken. The only way to migrate a project from a local repository to another one while keeping the link with the remote repository is to follow these steps:
- Make sure before you move that your source project is pushed and in sync with the remote repository
- On the new computer or workspace don't create a new destination project but import the one from the remote repository. Next section covers that topic.
- From there, you may go on developing and committing and keep pushing onto the remote repository.
- If for some reason at a given moment you can't push to the remote repository (no internet access, server temporarily unavailable, ...) you can keep going with local commits. Those are not lost. When you'll regain access to the remote server, then pushing the last commit will push everything between that commit and the last one that was already pushed onto the server.
7. Importing a project from GitLab
Open a new empty VSCode window and go to the Git tab.
Click on the big blue Clone Repository button and give your repository URL (from the Copy SSH clone URL button on GitLab's web interface):

Select the path where you want VSCode to clone your Git repository. Then, open it in VSCode.
Well done! The project is now cloned and you can start to Build/Debug as usual...